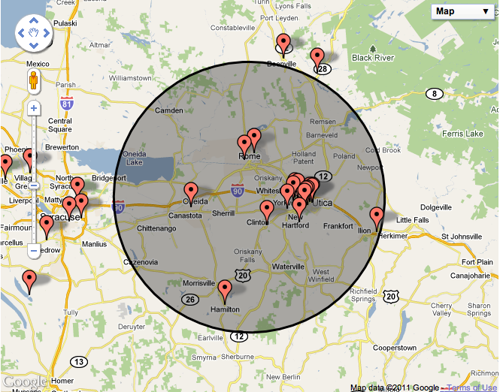
Meet Alex, a budding web developer working on a project for a local restaurant chain. The restaurant owner wanted to add a feature to their website that allowed customers to find the nearest branch. The requirement was clear: use geolocation to get the user’s current location and display the nearest restaurant on a map. Alex knew that the Geolocation API and Google Maps API were perfect for this, but she wasn’t entirely familiar with how to integrate them together.
As Alex dove into the world of JavaScript geolocation and maps, she discovered that these tools were incredibly powerful for building real-world applications. In this article, follow Alex’s journey as she learns how to integrate geolocation with the Maps API to build an interactive location-based service.
Chapter 1: What is the Geolocation API?
Alex's first step was understanding what the Geolocation API could do. The Geolocation API allows websites to access the geographical location of a user through their browser. It's a simple API with methods that return the latitude and longitude of a user’s device.
Here's how Alex started:
javascriptif (navigator.geolocation) {
    navigator.geolocation.getCurrentPosition(showPosition, showError);
} else {
    alert("Geolocation is not supported by this browser.");
}

function showPosition(position) {
    console.log("Latitude: " + position.coords.latitude);
    console.log("Longitude: " + position.coords.longitude);
}

function showError(error) {
    switch(error.code) {
        case error.PERMISSION_DENIED:
            alert("User denied the request for Geolocation.");
            break;
        case error.POSITION_UNAVAILABLE:
            alert("Location information is unavailable.");
            break;
        case error.TIMEOUT:
            alert("The request to get user location timed out.");
            break;
        case error.UNKNOWN_ERROR:
            alert("An unknown error occurred.");
            break;
    }
}
In this code snippet, Alex used the navigator.geolocation.getCurrentPosition() function to get the user’s current location. If successful, it calls the showPosition() function, where the latitude and longitude are logged to the console.
Real-Life Example: Locating Customers
For Alex's restaurant website, the ability to detect a customer’s location automatically meant they could easily find the nearest branch. This is a great way to improve customer experience, as visitors no longer have to manually input their location.
Chapter 2: Integrating the Google Maps API
Next, Alex needed to display the user’s location on a map. For this, she decided to use the Google Maps API. Google Maps allows developers to embed interactive maps into web pages with JavaScript, and it’s the perfect complement to the Geolocation API.
To begin, Alex had to load the Google Maps API script in her HTML:
html<script src="https://maps.googleapis.com/maps/api/js?key=YOUR_API_KEY"></script>
She then created a simple map centered on the user’s location:
html<div id="map" style="height: 400px; width: 100%;"></div>

<script>
function initMap() {
    var mapOptions = {
        center: {lat: 0, lng: 0},
        zoom: 10
    };

    var map = new google.maps.Map(document.getElementById('map'), mapOptions);

    if (navigator.geolocation) {
        navigator.geolocation.getCurrentPosition(function(position) {
            var userLocation = {
                lat: position.coords.latitude,
                lng: position.coords.longitude
            };
            map.setCenter(userLocation);

            var marker = new google.maps.Marker({
                position: userLocation,
                map: map,
                title: "You are here!"
            });
        });
    } else {
        alert("Geolocation is not supported by this browser.");
    }
}
</script>
In this code, Alex created a <div> for the map and used google.maps.Map() to generate the map. When the user’s location was retrieved using the Geolocation API, the map was centered on that location, and a marker was added.
Real-Life Example: Nearest Restaurant Location
Using Google Maps, Alex could now display the user's current location and place a marker for the nearest restaurant branch. This feature made it incredibly easy for customers to navigate to their desired location, whether they were browsing from home or on the go.
Chapter 3: Handling Errors and User Privacy
As Alex continued to refine the website, she knew it was important to handle potential errors and respect user privacy. Some users might not want to share their location, so Alex needed to include clear messaging and error handling.
Here’s how she updated her code to handle permissions more gracefully:
javascript
navigator.geolocation.getCurrentPosition(
function(position) {
var userLocation = {lat: position.coords.latitude, lng: position.coords.longitude};
// Display the map...
},
function(error) {
if (error.code === error.PERMISSION_DENIED) {
alert("You have denied access to your location. Please enable it to view your nearest restaurant.");
} else {
alert("Unable to retrieve location information.");
}
}
);
By providing meaningful messages for different error scenarios, Alex ensured a better user experience.
Chapter 4: Advanced Features
With the basics covered, Alex explored advanced features of the Google Maps API:
Custom Markers: Alex used custom icons to display different types of locations, such as restaurants, parks, and hotels, on the map.
Real-Time Updates: For delivery tracking, Alex learned how to update the user's position on the map in real-time by continuously polling the Geolocation API.
javascript
function updatePosition(map, marker) {
navigator.geolocation.watchPosition(function(position) {
var newPos = {
lat: position.coords.latitude,
lng: position.coords.longitude
};
marker.setPosition(newPos);
map.setCenter(newPos);
});
}
By the end of her project, Alex had mastered both the Geolocation and Maps API. The result was an interactive, user-friendly website that provided valuable features to customers while showcasing Alex’s development skills.
Conclusion
By integrating the Geolocation API and Google Maps API, Alex was able to deliver a powerful feature to her client’s website. From helping customers find nearby restaurant branches to exploring local attractions, these APIs allow developers to create location-based services that enhance user experience. Whether you’re building a simple map or a complex tracking system, understanding how to work with these APIs will open new opportunities for your web development projects.


