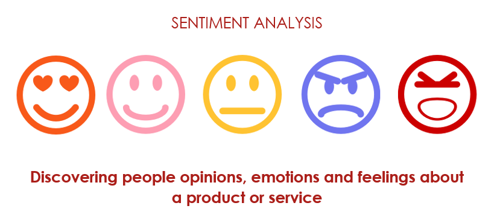
In the bustling world of customer service and online reviews, sentiment analysis has become a crucial tool for businesses to gauge public opinion and improve their products and services. Imagine you’re a small business owner named Sarah, running a boutique coffee shop in Lagos. You’ve noticed an increasing number of reviews online, both positive and negative, and you want to understand what your customers are really saying about your shop.
Sarah decides to build a sentiment analysis tool to automatically analyze customer reviews and categorize them into positive, neutral, or negative sentiments. She chooses C# for this task due to its powerful libraries and easy integration with various data sources. Let’s follow Sarah’s journey as she develops her sentiment analysis tool step-by-step.
Step 1: Setting Up Your Development Environment
To start, Sarah needs to set up her development environment. She installs Visual Studio, a popular Integrated Development Environment (IDE) for C#, and creates a new console application project named SentimentAnalysisTool.
Step 2: Installing Necessary Libraries
Sarah will use the ML.NET library for machine learning tasks, which simplifies building and training sentiment analysis models. She installs the Microsoft.ML NuGet package via the NuGet Package Manager Console in Visual Studio:
bashInstall-Package Microsoft.ML
Additionally, Sarah installs the Microsoft.ML.TextAnalytics package to help with text processing:
bashInstall-Package Microsoft.ML.TextAnalytics
Step 3: Preparing the Data
Sarah needs a dataset of customer reviews for training her model. She finds a dataset online containing labeled reviews (positive, neutral, negative) and saves it as reviews.csv. The dataset might look like this:
mathematicaReviewText, Sentiment
"Great coffee and friendly staff!", Positive
"I didn't like the coffee.", Negative
"Service was okay, nothing special.", Neutral
...
Step 4: Building the Sentiment Analysis Model
Sarah writes the code to build and train her sentiment analysis model. Here’s how she does it:
Define Data Classes
She creates classes to represent the input data and the prediction result:
csharpusing System;
using Microsoft.ML.Data;

public class ReviewData
{
    [LoadColumn(0)]
    public string ReviewText { get; set; }

    [LoadColumn(1)]
    public string Sentiment { get; set; }
}

public class ReviewPrediction
{
    [ColumnName("PredictedLabel")]
    public string Sentiment { get; set; }
}
Load and Process Data
Sarah loads the data from the CSV file and prepares it for training:
csharpusing Microsoft.ML;
using System.Linq;

class Program
{
    static void Main(string[] args)
    {
        var context = new MLContext();

        // Load data
        var data = context.Data.LoadFromTextFile<ReviewData>("reviews.csv", separatorChar: ',', hasHeader: true);

        // Split data into training and test sets
        var trainTestSplit = context.Data.TrainTestSplit(data, testFraction: 0.2);
        var trainData = trainTestSplit.TrainSet;
        var testData = trainTestSplit.TestSet;

        // Define data processing pipeline
        var pipeline = context.Transforms.Conversion.MapValueToKey("Sentiment")
            .Append(context.Transforms.Text.FeaturizeText("Features", "ReviewText"))
            .Append(context.Transforms.Concatenate("Features", "Features"))
            .Append(context.Transforms.Conversion.MapKeyToValue("PredictedLabel"))
            .Append(context.BinaryClassification.Trainers.SdcaLogisticRegression("Sentiment", "Features"));

        // Train the model
        var model = pipeline.Fit(trainData);

        // Evaluate the model
        var predictions = model.Transform(testData);
        var metrics = context.BinaryClassification.Evaluate(predictions);

        Console.WriteLine($"Log-loss: {metrics.LogLoss}");
    }
}
Making Predictions
Sarah writes code to use the trained model for making predictions on new reviews:
csharpusing System;

class Program
{
    static void Main(string[] args)
    {
        var context = new MLContext();

        // Load trained model
        ITransformer model = context.Model.Load("model.zip", out var modelInputSchema);

        // Create prediction engine
        var predictionEngine = context.Model.CreatePredictionEngine<ReviewData, ReviewPrediction>(model);

        // Test the model with a new review
        var review = new ReviewData { ReviewText = "The coffee was excellent and the ambiance was great!" };
        var prediction = predictionEngine.Predict(review);

        Console.WriteLine($"The sentiment of the review is: {prediction.Sentiment}");
    }
}
In the above code, Sarah loads the model and uses it to predict the sentiment of a new review.
Step 5: Improving and Expanding the Tool
With the basic model in place, Sarah can improve and expand her tool by:
- Collecting More Data: Gathering more reviews and retraining the model to improve accuracy.
- Enhancing the Model: Experimenting with different algorithms and text-processing techniques to refine predictions.
- Integrating with Other Systems: Connecting the sentiment analysis tool to her business’s CRM system to automatically analyze customer feedback in real time.
Conclusion
Sarah’s journey from a small business owner to a developer of a sentiment analysis tool demonstrates the power of C# and ML.NET in transforming how businesses understand their customers. By following these steps, anyone can build their own sentiment analysis tool to gain valuable insights and improve customer experiences.


